- Code:
L19-SN5543
- Pack Size:
2.22
- Unit of Measure:
m2
- Dimensions:
8mm x 192mm x 1285mm
- Packs / Pallet:
52
- Installation Method:
Click, Floating
- Underfloor Heating:
Yes
Home / / Krono Original Colorado Oak 8mm
€16,50


€16,50
Description
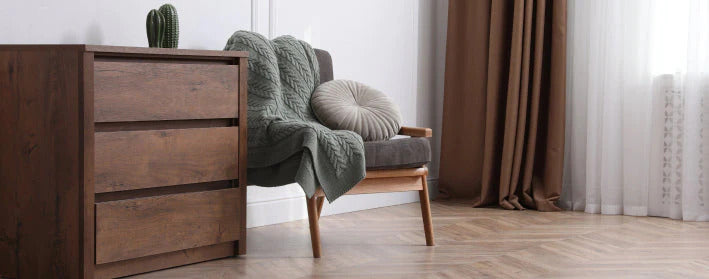
Unique, affordable and high quality laminate flooring.
30 Day Guarantee Returns
Buy Now Pay Later

Home Delivery or Click & Collect


Length:
1285mm
Thickness:
8mm
Installation Method:
Click and Tap
Width:
192mm
Box Size:
2.22m sq
Finish:
EIR (Embossed in Register)
How would you clean this floor?
We would recommend cleaning this floor with a lightly damp mop.
Would this floor be suitable for pets?
Yes, this floor is extremely suitable for households with pets due to its AC4 rating
What does AC4 rating mean?
An AC rating refers to the level of wear and tear a floor can endure. AC4 means it is perfect for heavy domestic or light commercial settings.
How much floor should i order to ensure i have enough?
For our straight plank floors, we would recommend adding on 5% to the area you are covering to account for waste.
Does this floor require an underlay?
Yes, all laminate flooring require underlay. we have a number of underlay available to suit any need.
Site Prep, Subfloor and Underlay
One of the most important stages to consider prior to laying any type of flooring installation is site prep.
Remove all furniture from the room, brush and vacuum the sub-floor.
When fitting any flooring a key factor in site preparation is ensuring the subfloor is level. Take time to look for any unevenness in the surface. This could be nails, lumps of concrete or generally anything that would obstruct the laminate from being laid perfectly flat. In some cases, levelling compound or sheets of plywood may be needed to achieve this. Also, test for dips or humps in the sub-floor using a long straight edge such as a spirit level. Place it in multiple areas of the room and get down low to look for any potential dips or humps. Anything over 2mm in a 1 metre run should be levelled out using a suitable floor levelling compound.
If you are laying onto a new concrete sub-floor, check that it is fully dried which can take anywhere from 2 - 4 months.
Most underlays are suitable to use with laminate flooring. When choosing your underlay, you may decide to go for a noise-reducing underlay, typical foam underlay or one suitable for underfloor heating.
Expansion Gaps
It is vital to leave a consistent expansion gap of 7-10mm at walls, pillars, stairs, doorways and other fixed objects or boarders in the room such as kitchen islands or fitted wardrobes. When drilling a hole for pipes, the hole should be 7-10mm larger than the pipe itself. Objects should not be fixed to a floating floor as this prevents the floor from expanding or contracting when needed.
Materials needed:
Tri square Tape measure
Spirit level
Ruler
Pencil
Saw or stanley knife 7 - 10 mm spacers Rubber mallet Underlay
Flooring Pencil
Installation Guidelines
*** These instructions are a guide only. If you are unsure about anything you should refer to the instructions provided with your materials. ***
Start in a corner and work left to right. The end with a shorter tongue should be placed against the wall. 7 - 10mm expansion spacers should be used along the wall to maintain a consistent gap. The gap will allow for any natural expansion in the future that comes with changing seasons. Without this gap, you may encounter some issues with your laminate floor.
The second board should be laid fitting the tongue and groove mechanisms together. It is always best to refer to the specific brand’s guidelines as these grooves differ between brands. Repeat this process until the end of the row.
In the case that the last board of the row is too long, you will need to cut this down to fit with a saw. Remember to account for the expansion spacer in this measurement. Turn the board 180 degrees in order to measure accurately and lay next to the previous board laid. After cutting, place the board down with the cut side next to the wall.
The typical design for laying wooden floors is to keep the ends of the boards approximately 30 cm apart. If the cut off board from the previous row is longer than 30cm, use this as the first board of the second row. The freshly cut side should always face the wall. However, if it’s too short, you can cut down another board to use instead. It is advised to keep a consistent length of 30cm between the ends of the boards in order to maintain this look.
In most cases, you will need to fit long edges together at 30 degrees from the floor before lowering it and locking it in place. The boards should then slide together into place. This is only the case for most brands so the manufacturer’s guidelines should always be considered.
If any last boards need to be cut lengthways, you can use another board to guide any markings needed before cutting.
Assuming these guidelines are followed and the manufacturer’s instructions are studied accordingly, there should be no issues with laying a laminate floor.
• If you need any more assistance with this you can call our team on 01 840 4458 or email us at hello@woodfloorstore.ie.
Protection
Laminate floors are commonly difficult to scratch and chip but that doesn’t mean they’re indestructible. To help avoid unwanted marks and chips we have some tips for you!
Use wood flooring felt pads on heavy furniture and chairs that will be used frequently.
Check shoes, especially heels and football boots for any metal or hard materials that may damage your floor.
Install door mats at entrances to help remove any dirt, stones, and moisture from the bottom of shoes.
Cleaning
It is important to clean your floor regularly with the correct products and care.
For the initial clean, vacuum with a brush head attachment to remove any dirt, dust and debris. Then, we recommend using a damp mop and a floor cleaner that doesn’t contain bleach.
Unless you have waterproof laminate flooring, spillages and leaks must be cleaned up immediately as laminate floors can become damaged by moisture. Ensure that it is completely dried up to avoid damage.
Humidity in the room should be kept at a constant between 40-65%RH.
Contact us
L19-SN5543
2.22
m2
8mm x 192mm x 1285mm
52
Click, Floating
Yes
How would you clean this floor?
We would recommend cleaning this floor with a lightly damp mop.
Would this floor be suitable for pets?
Yes, this floor is extremely suitable for households with pets due to its AC4 rating
What does AC4 rating mean?
An AC rating refers to the level of wear and tear a floor can endure. AC4 means it is perfect for heavy domestic or light commercial settings.
How much floor should i order to ensure i have enough?
For our straight plank floors, we would recommend adding on 5% to the area you are covering to account for waste.
Does this floor require an underlay?
Yes, all laminate flooring require underlay. we have a number of underlay available to suit any need.
Protection
Laminate floors are commonly difficult to scratch and chip but that doesn’t mean they’re indestructible. To help avoid unwanted marks and chips we have some tips for you!
Use wood flooring felt pads on heavy furniture and chairs that will be used frequently.
Check shoes, especially heels and football boots for any metal or hard materials that may damage your floor.
Install door mats at entrances to help remove any dirt, stones, and moisture from the bottom of shoes.
Cleaning
It is important to clean your floor regularly with the correct products and care.
For the initial clean, vacuum with a brush head attachment to remove any dirt, dust and debris. Then, we recommend using a damp mop and a floor cleaner that doesn’t contain bleach.
Unless you have waterproof laminate flooring, spillages and leaks must be cleaned up immediately as laminate floors can become damaged by moisture. Ensure that it is completely dried up to avoid damage.
Humidity in the room should be kept at a constant between 40-65%RH.
Contact us