iconBuy now,
Pay later
Wholesale
Prices Direct
Free
Samples
Nationwide
Delivery

Home / Google Merchant / Fika Brushed Oak Natural Herringbone

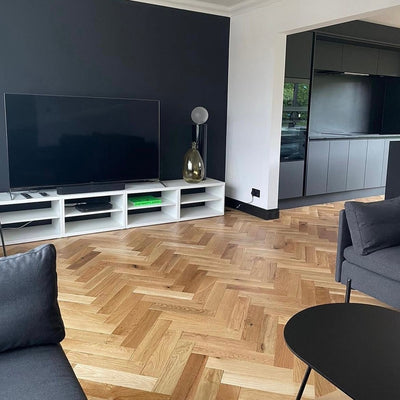
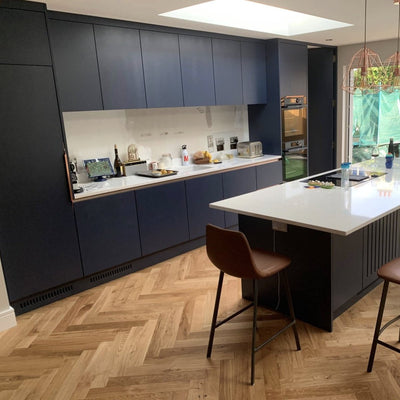
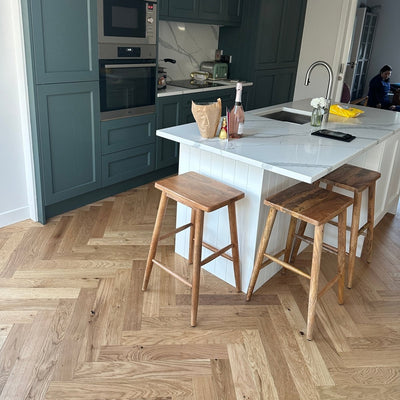
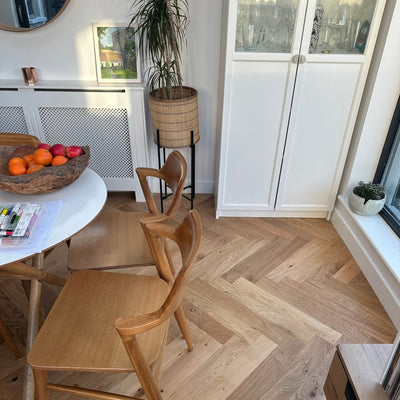
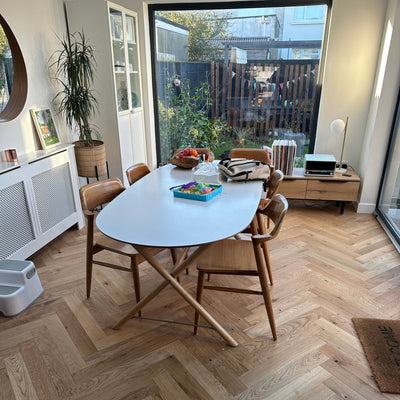
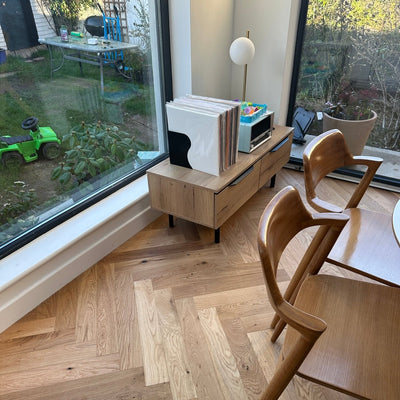
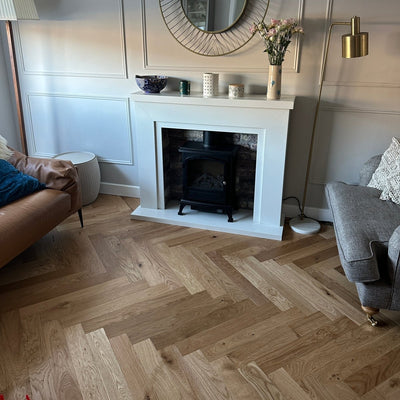
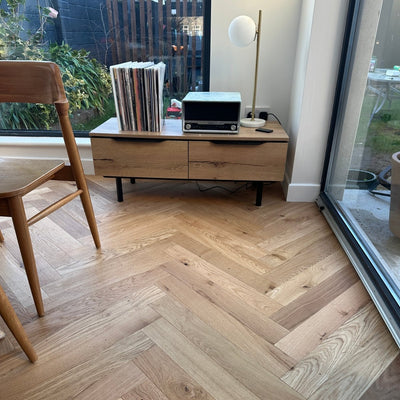
Fika Brushed Oak Natural Herringbone

Product Specifications

Length:

600mm

Thickness:

14mm

Installation Method:

Glue Installation

Width:

110mm

Box Size:

1.296 sqm

Finish:

Matt

The Konig Native range is a perfect example of quality, hardwood flooring. Multi Layer Birch Plywood provide structure to the flooring, and with a real wood wear layer on top you get the best of both worlds;  the character and feel of a real wood floor, while giving you the stability the engineering provides.


Can this be used in a kitchen?

Yes, this floor can be use in a kitchen, but ensure care is taken with spills.


How do you recommend cleaning this floor

We woulds recommend cleaning the floor with a lightly damp mop


Does this floor need treatment?

The floor has already been treated so there is nothing to be done once it is laid.

Site prep, subfloor and underlay

One of the most important stages to consider prior to laying any type of flooring installation is site prep.

Remove all furniture from the room, brush and vacuum the sub-floor.

When fitting any flooring a key factor in site preparation is ensuring the subfloor is level. Take time to look for any unevenness in the surface. This could be nails, lumps of concrete or generally anything that would obstruct the laminate from being laid perfectly flat. In some cases, levelling compound or sheets of plywood may be needed to achieve this. Also, test for dips or humps in the sub-floor using a long straight edge such as a spirit level. Place it in multiple areas of the room and get down low to look for any potential dips or humps. Anything over 2mm in a 1 metre run should be levelled out using a suitable floor levelling compound.

If you are laying onto a new concrete sub-floor, check that it is fully dried which can take anywhere from 2 - 4 months. The moisture reading should be lower than 0.3% CM Moisture. Good quality underlay should be used underneath the flooring.

Expansion Gaps

It is vital to leave a consistent expansion gap of 15mm at walls, pillars, stairs, doorways and other fixed objects or boarders in the room such as kitchen islands or fitted wardrobes. When drilling a hole for pipes, the hole should be 15mm larger than the pipe itself. Objects should not be fixed to a floating floor as this prevents the floor from expanding or contracting when needed.

Installation Guidelines

Materials needed:

Hammer
Square
Tape measure Screw driver Flooring adhesive Flooring
Chalk line Circular saw or hand saw Router
Rubber mallet Wood glue Screws Flooring nailer and nails Painter’s tape

*** These instructions are a guide only. If you are unsure about anything you should refer to the instructions provided with your materials. ***

To find the optimal design for your space, first decide which direction you want your pattern to face - typically a herringbone floor follows the length of the room.

A herringbone design should typically be started from a central axis. The tape measure can be used to find the centre of the room. A chalk line tool or straight edge can be used to mark a line down the centre of the room. Then mark a parallel chalk line 530mm to the left of the centre line and another 530mm to the right of the centre line. These will serve as guides for the outer edges of the first two rows and the corner of each board should be checked once installed to ensure it is parallel to the chalk guideline. You may need to snap additional lines as guides for the outer rows as you proceed with the installation.

Prepare a perfectly square piece of plywood as a started board (approx 750mm x 750mm).

Select your starting area in the middle of the room and screw the starter board on the

subfloor in a diamond position - ie with one pointed edge pointing to the opposite wall. this

point should align with the centre line drawn in the room.

It is recommended to open a few packs of flooring and sort the planks into lefts and rights

on either side.

When beginning installation in the area, spread the adhesive out from the edges of the starter

board and over a reasonable area, use a 3-6mm notch trowel.

Set the first left-tongue plank to the left-hand side of the starter board with the grooved side

snug to the starter board and the tongue facing out towards the room, make sure the upper butt ends aligned with the centre line, press the left-tongue plank down to the sub-floor.

Set the right-tongue plank to the right-hand side of the starter board with the grooved side snug to the starter board and the tongue side facing out towards the room. Make sure the upper end butt is engaged with that of the left-tongue plank and the tongue end of the right- tongue plank lines up with the tongue side of the left-tongue plank, press the right-tongue board down to the subfloor.

Avoid pushing the board into place across the subfloor as this may unevenly redistribute the adhesive. Instead, hold the new board above the subfloor at an angle and engage the tongue and groove joint, then press the board directly down on the subfloor.

Start the second left-tongue plank, place the new plank with the groove side snug to the tongue side of the first board. Make sure the upper butt ends aligned with the centre line, press the board down on the subfloor.

Continue the second right-tongue plank, place the new plank with the groove side snug to the tongue side of the first board. Make sure the upper end butts is engaged with that of the second left-tongue board and the tongue end of the right-tongue plank lines up with the tongue side of the left-tongue plank. Press the right-tongue board down to the subfloor over the moisture barrier membrane.

Install the first 3 boards and allow time for the adhesive to cure before continuing with the installation in that section.

Start the next row. Place the new left-tongue plank against the previous row. Make sure it’s engaged with the previous right-tongue plank and press down. Continue the second row with the right-tongue plank. Make sure the upper butt is engaged with that of the left-tongue plank and line up the tongues. Press the right-tongue plank down. Snap a new parallel chalk line through the upper end. This is the centre line of the new row.

Continue working forward until the first two rows of flooring are complete to the far wall. Cut the final row to fit. A 3-5mm expansion gap should be allowed between the floor and wall itself or any other fixed objects throughout the room.

Start the new rows as repeating the above instructions until the installation is completed. Measure and cut the final row planks to fit, allowing a 3-5mm expansion gap.

Check the measurements and row alignment frequently to ensure that the rows are staying true and square. If necessary, you can strap the boards using the low tack masking tape.

With every new row, a new centre line should be drawn before any flooring is laid as a guide throughout.

When installation is complete, remove all masking tape on the floor. Do not leave this tape on for more than 24 hours after installation. Furniture, appliances and other heavy objects should not be placed on the floor until more than 24 hours after installation.

Ensure no adhesive is forced into tongue and groove joints during installation. Avoid getting adhesive on the flooring surface. Make sure to clean up any seepage or spills immediately according to the adhesive manufacturer’s instructions.

Remove adhesive seepage and spills immediately after laying each board. Always test solvents first on an off-cut to ensure that the solvent does not affect the colour or finish of the boards.

Once installation is complete, any spacing wedges used can be removed. The expansion gap around the perimeter of the floor can be covered by refitting the skirting boards, either by nailing, screwing or gluing directly to the perimeter walls. Never fix them directly to the installed floor. If the skirting boards were not removed for installation, you can cover the expansion gap using moulding trims that attach to the skirting with glue or panel pins. At doorways or where boards meet tiles or carpet, a door threshold strip should be used to protect the edges of the floor and provide a decorative transition from one floor type to another. Any visible joints or gaps should be filled with a non-silicon based filler (eg., caulk or other fillers) to match the colour of the timber.

• If you need any more assistance with this you can call our team on 01 840 4458 or email us at hello@woodfloorstore.ie.

Protection

Scratches are normal and very hard to avoid with real wood but the following tips will help prevent this as much as possible:

  • Use felt pads under furniture and chairs.
  • Check shoes, especially heels and football boots for metal and other hard materials that may leave marks.
  • Install door mats at entrances to help remove any dirt, stones, and moisture from the bottom of shoes.
  • Lift items, don’t drag them
  • Use maintenance oils or lacquer protection.


Heat and humidity

When installing and maintaining an engineered floor it is important to ensure site conditions are suitable. Wood is a natural product and subject to change when exposed to varying levels of moisture and heat. Before installing an engineered floor it is important to get a moisture reading between 7% - 9% in at least 20 spots per 1,000 sq feet.

Humidity in the room should be kept between 40-65%RH. This is a normal range for houses in the UK and Ireland. If this is something you have concerns about you can use a hygrometer to measure the humidity level in your home.

The room of installation should be kept between 16-28°C which is something the most homes or commercial environments will normally be within.


Contact us

Product Details

The Konig Native range is a perfect example of quality, hardwood flooring. Multi Layer Birch Plywood provide structure to the flooring, and with a real wood wear layer on top you get the best of both worlds;  the character and feel of a real wood floor, while giving you the stability the engineering provides.


Description

  • 3mm top layer
  • Suitable for Heavy Domestic use
  • Tounge and Groove System
  • Suitable for Underfloor Heating

Specifications 

  • Length: 600mm
  • Width: 90mm
  • Thickness: 14mm
  • Box Size: 1.296m sq
  • Installation Method: Tounge and Groove
  • Underfloor Heating: Compatible 
  • Finish: Matt

Product Features

  • Water Resistant
  • Scratch Resistant
  • 3mm wear layer
FAQ’s

Can this be used in a kitchen?

Yes, this floor can be use in a kitchen, but ensure care is taken with spills.


How do you recommend cleaning this floor

We woulds recommend cleaning the floor with a lightly damp mop


Does this floor need treatment?

The floor has already been treated so there is nothing to be done once it is laid.

Maintenance

Protection

Scratches are normal and very hard to avoid with real wood but the following tips will help prevent this as much as possible:

  • Use felt pads under furniture and chairs.
  • Check shoes, especially heels and football boots for metal and other hard materials that may leave marks.
  • Install door mats at entrances to help remove any dirt, stones, and moisture from the bottom of shoes.
  • Lift items, don’t drag them
  • Use maintenance oils or lacquer protection.


Heat and humidity

When installing and maintaining an engineered floor it is important to ensure site conditions are suitable. Wood is a natural product and subject to change when exposed to varying levels of moisture and heat. Before installing an engineered floor it is important to get a moisture reading between 7% - 9% in at least 20 spots per 1,000 sq feet.

Humidity in the room should be kept between 40-65%RH. This is a normal range for houses in the UK and Ireland. If this is something you have concerns about you can use a hygrometer to measure the humidity level in your home.

The room of installation should be kept between 16-28°C which is something the most homes or commercial environments will normally be within.


Cleaning

Regular cleaning of an engineered floor should include hoovering with a brush head attachment. You can also use a well-drained damp mop and a suitable wood cleaner to obtain a better finish. There are different types so ensure to always read the label.


Additional Info

  • Engineered floors will expand and contract with change in heat and moisture. 
  • Spillages must be cleaned immediately to avoid damage.
  • Colouring of the floor will change over time.
  • Oiled flooring required more maintenance than lacquered.
Contact Us

Contact us

Can't find the flooring you've dreamed of?
Get in touch today

Search